Tools:
Multimeter
Precision soldering iron
Screwdriver set
Tweezers, wire strippers
LEDs, ICs, and other components
Thermal paste
Safety Measures:
Before beginning repairs, always disconnect the power cord to avoid electric shock.
Work in a static-free environment and wear an anti-static wrist strap to prevent damage to sensitive components.
Provide ventilation when soldering to avoid inhaling toxic fumes.
Safety glasses and gloves provide additional protection.
Documentation: Record diagnostic steps and repair parts for future reference.
LED Screen Module Issues
Module Not Displaying
Symptoms: The entire module does not illuminate or respond to input signals.
Causes:
Signal interruption due to a damaged or loose cable.
Inadequate or interrupted power supply.
Faulty module circuitry or IC components.
Troubleshooting:
Check connections: Check for loose connections or physical damage on the power and signal cables. Replace any broken cables and secure any loose wires.
Test the power supply: Use a multimeter to measure the voltage at the module’s power input point. For standard LED modules, the voltage should be between 5-5.2V. Replace any power supply that falls outside this range.
Replace the module: To determine whether the problem lies with the module or the system, swap the non-functioning module with a functioning one.
Reset and reconnect: Disconnect all cables from the module, wait a few seconds, and then reconnect them. This will resolve minor connection issues.
Single Dead LED
Symptom: One or more pixels will not light up.
Cause: Weak solder joint, open circuit, or physical damage to the LED bead.
Troubleshooting:
Testing the bead: Use a multimeter to test the bead. Place the black probe on the positive terminal and the red probe on the negative terminal. If the bead does not light up, it is defective.
Replacing the bead:
Use tweezers to gently remove any protective gel surrounding the bead.
Use a soldering iron to desolder and remove the defective bead. Do not overheat to avoid damaging adjacent components.
Solder a new bead, ensuring correct polarity and a secure connection.
Testing after repair: Power the module to see if the new bead works.
Lamp Bead Structure Issue
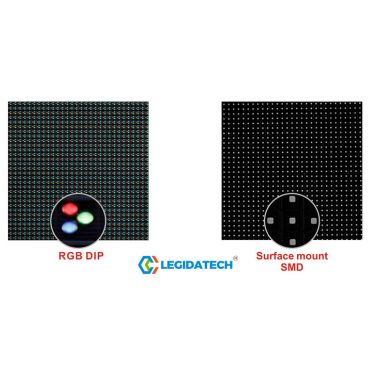
RGB LED: Each LED pixel consists of three primary colors—red (R), green (G), and blue (B)—and a common + pin.
Troubleshooting:
Connection Troubleshooting: Identify weak or damaged solder joints on the RGB pins or the + pin. Inspect carefully using a magnifying glass.
Repair Steps:
Resolder loose connections using a fine-tip soldering device.
Apply thermal paste for better heat dissipation.
Color Balance Check: After repair, test the display to see if all colors are displayed correctly and are not imbalanced or dimmed.
Multiple lights are defective
Symptoms: Lights across the entire section do not illuminate or display inconsistent colors.
Cause: Driver IC failure, open circuit, or interrupted signal path.
Troubleshooting:
Driver IC problem: Locate the IC controlling the defective section and test its output connections.
Replace IC: Desolder the defective IC and replace it with a new one. Ensure it is aligned with the PCB layout.
Circuit check: Trace the signal path to locate and repair any open or weak solder joints.
Display Issues
Missing Color Blocks
Symptom: An entire section of the display is missing one or more colors, either red or blue.
Troubleshooting:
Signal Integrity Test: Use a multimeter to test the continuity of the signal cable carrying color data.
Power Cable Check: Ensure that the power supply to the affected module is stable.
Replace the IC or Module: Replace the IC controlling the missing color or replace the entire module as needed.
Columns Not Illuminated
Symptom: One or more columns are not illuminated.
Troubleshooting:
Column Driver Diagnostics: Check the output pins of the IC that controls the affected column.
Repair and Strengthen Connections: Resolder the connections between the IC and the column.
Replace the Faulty IC: If resoldering does not resolve the issue, replace the IC and retest.
One column is lit
Symptom: Only one column is working, while the other columns in the same module are dark.
Troubleshooting:
Short circuit: Check the signal and power lines for shorts or broken pins.
Replace a critical component: Replace the IC driver for the single working column.
Verify the repair: Use test mode to see if the repaired module displays all columns correctly.
Low Brightness and Blurry Images
Symptoms: Dim, blurry visuals, and degraded display quality.
Troubleshooting:
Software Settings: Open the control software and manually increase the brightness. Ensure the setting is above the minimum.
Power Supply Output Test: Check for voltage drops that may cause low brightness. Replace any underperforming power supply.
Clean and Align the Module: Dust and debris can cause blurriness. Clean the module and realign the components as needed.
Advanced Display Issues
Blinking or Shaking Display
Symptoms: Flickering images or shaky visuals.
Potential Causes:
Loose or broken signal cable.
Firmware mismatch between the sending and receiving cards.
Power fluctuations causing unstable performance.
Troubleshooting:
Tighten physical connections: Check and secure all connections between the signal source, sending card, and receiving card. Focus on DVI, HDMI, or fiber optic cables that may be frayed.
Replace cables: Replace old or damaged cables with new ones to ensure signal continuity.
Firmware Check: Verify firmware compatibility across the entire system. If a mismatch is found, update both the sending and receiving cards to the latest version.
Power System Test: Use a multimeter to measure the voltage stability and amperage of the power supply. Replace any power supply that cannot maintain a stable voltage output.
Recalibrate Sync Settings: On the system control panel, you should recalibrate the sync settings. For input signal to energy, the input signal needs to match the output display parameters of the device.
Stress Test: A prolonged diagnostic display using different patterns and colors is performed to ensure the problem has been corrected so flickering is not observed.
Screen Flickering Under Load
Symptoms: It looks fine when used at low intensity, but tends to flicker or clip when running heavy content like animations or videos.
Potential Causes:
High power usage during periods of low availability.
Reduce internal system cooling.
How to Troubleshoot:
Power Supply Load Assessment: Record the total power consumption of appliances when they are in regular use. If they are not meeting the required demand, upgrade your power supply.
Cooling System Enhancement: Add more fans or a heat sink to more effectively control the temperature inside the device. When circuits are under high load, they can become unstable due to the excessive heat generated.
Internal Wiring Inspection: Inspect all internal plugs and unmarked connections for any signs that the connectors are stressed or bent due to the flexibility of the parts. Replace damaged wires.
Replace High-Output Modules: Swap out modules that appear to be damaged under high-output conditions.
Delayed Response or Input Lag
Symptoms: There is a noticeable delay between the time an input command is registered and when it appears on the LED display.
Potential Causes:
Outdated software.
Other limitations in control system bandwidth.
How to Troubleshoot:
Optimize system bandwidth: Use Cat6 or fiber-optic network cables to increase data transfer speeds.
Upgrade graphics cards: Avoid using older, high-latency cards; instead, replace them with newer, high-capacity cards designed for low latency.
Software Updates: Ensure control software is up-to-date and all manufacturer-issued patches are current.
Display Settings Adjustments: Reduce the refresh rate and synchronize the settings with the input signal, or increase the latency for optimal input/output timing.
Irregular Brightness Between Modules
Symptoms: In some modules, the display is significantly dimmer or brighter than in others, resulting in extreme contrast.
Potential Causes:
Module age and performance differences.
Uneven power distribution.
Troubleshooting:
Standardize module firmware: Check and ensure all modules have the same firmware to minimize performance variations.
Power supply consistency check: Scan the power distribution system to observe the output of each module. Any irregular or faulty power supply can be replaced.
Recalibrate brightness levels: Use system calibration tools on all operating modules to ensure uniform brightness control. Some of these can be automated, while others require manual work and may require software adjustments and fine-tuning.
Horizontal or vertical line artifacts
Symptoms: Thin lines across the observed area of the display.
Potential causes:
Physical contact between different cables causing them to interfere or experience crosstalk.
Damaged driver integrated circuit or faulty data line.
How to troubleshoot:
Isolate the source: Strip isolated signal cables to locate the area where the interference is occurring, reducing the possible source of interference.
Replace the driver IC: Replace the chip associated with the data input in the affected area.
Shielded cables: Upgrading to shielded cables may minimize signal interference from other sources or power lines.
More Troubleshooting and Repair Tips
Display Not Working, Blinking Green
Symptom: The power indicator is blinking green, but the screen is black.
Troubleshooting:
Check the signal path: Ensure the sending card is connected to the receiving card via a signal cable.
Voltage Test: Use a multimeter to measure the power at critical points. Replace any unstable power supply.
System Software Reconfiguration: Reset the control software and ensure it is compatible with the connected hardware.
Display is not working and is not flashing green.
Symptoms: The indicator light is not active, or the power or connection fails.
Troubleshooting:
Check all connections: Recheck the DVI/HDMI connections and make sure they are properly seated.
Software update: Reinstall or upgrade to the latest software version.
Replace the sending card: If all other methods fail, install a new sending card and recalibrate the system.
The entire LED display is black.
Symptom: The screen is completely black, with no activity.
Troubleshooting:
Main Power Check: Verify the continuity and functionality of the main power supply.
Network Link Check: Replace the faulty network cable connecting the system components.
Backup System Test: If available, test the backup power supply or redundant signal source.
No Large Screen System
Symptom: When you turn on the screen, it displays “No Large Screen System” or something similar.
Troubleshooting:
Check the serial connection: Make sure the serial cable is plugged in and not damaged.
Test with another computer: Connect the system to another computer to rule out software issues.
Reinstall the software: Uninstall any old software and reinstall the latest version.
Replace the faulty part: If it still doesn’t work, replace the sending card or serial cable.
Some LEDs are not lighting
Symptom: Some LEDs in the setup are not lighting, even though other LEDs are functioning normally.
Troubleshooting:
Check the power connection: Ensure the power cable for the affected LED is plugged in.
Test the power supply unit: Check the power supply to the affected module for any faults or issues. Replace it if necessary.
Reconnect the cables: Unplug and replug the signal and power cables for the affected LED.
All LEDs are not displaying.
Symptom: The entire screen is black or unresponsive.
Troubleshooting:
Main Power: Make sure the main power is on.
Network Link: Check that the network cable and connector are plugged in and functioning properly.
Backup System: If you have a backup or redundant system, test it and switch to it if necessary.
Replacing the Data Collector Card: If the above steps do not work, replace the main data collector card that provides signal to the system.
Multiple cabinets are not displaying.
Symptoms: Several cabinets are not lighting up, and there are black spots on the LED screen.
Troubleshooting:
Network Cable: Check if the network cable is loose, damaged, or disconnected. Replace or reseat the cable if necessary.
Power Supply: Ensure that the cabinet that is not functioning properly is powered on. Replace the faulty power supply.
Replace the faulty device: If the problem persists, replace the power supply or network cable in the affected area.
One cabinet is not displaying
Symptom: Only one cabinet is not functioning, while the rest of the displays are functioning normally.
Troubleshooting:
Receiver Card: Test or replace the receiving card in the non-functioning cabinet.
Program File: Re-upload or reset any missing program files that may be causing the cabinet to dim.
Power Supply: Ensure the cabinet’s power is on. If the power supply is not providing power to the receiving card, replace the power supply.
Multiple LEDs in the cabinet are not displaying
Symptom: Multiple LEDs in the cabinet are not lighting or displaying anything.
Troubleshooting:
Ribbon Cable: Check that the ribbon cables connecting the modules are secure. Replace any loose or broken cables.
Driver IC: Check the driver ICs of the affected modules. Replace any faulty ICs if necessary.
Signal Cable: Ensure that signals are transmitted uninterrupted between all affected modules.
All displays display the same content.
Symptom: All connected displays display the same content instead of working independently.
Troubleshooting:
Network Files: Reset and reprogram network settings to display different content on each display.
Network Connections: Test the network cable and ensure that data packets are reaching each display.
Indicators: Check the indicator lights on the transmitting device to ensure the signal is being sent as expected.
Displays Are Not Synchronized
Symptoms: Content on multiple monitors is out of sync, delayed, or misaligned.
Troubleshooting:
Graphics Settings: On the control panel, ensure that Clone Mode or Clone Mode is enabled for multi-monitor synchronization.
DVI/HDMI Configuration: Check that the DVI/HDMI connection between monitors is properly installed and functioning.
Timing Settings: Use the system software to synchronize the refresh rate and timing between monitors.
Ghosting Images
Symptoms: Ghosting or trailing images follow moving objects on the display, and the display is unstable.
Troubleshooting:
Signal Cable: Check and reseat the signal cable to prevent delays and interference in data transmission.
DVI Cable: Use a high-quality shielded DVI cable to reduce signal degradation.
Sending Card: If ghosting persists, replace the sending card for better signal processing.
Indicator and LED Control System Issues
Receiving Card Indicator
Status Indicator Meaning:
Flashing green indicates normal status or a supervisory signal issue.
Abnormal red power light indicates a voltage issue requiring attention.
Preventive Maintenance Tips
1. Cleaning
Avoid using harsh materials and use a microfiber cloth to clean dust and spots.
Avoid using strong solvents that may interfere with the coating or damage the circuitry.
2. Environmental Protection
Control airflow around the internal screen to prevent overheating.
The UV-stabilized housing is suitable for outdoor use and is resistant to water, dust, heat, cold, and moisture.
3. Software and Firmware Updates
Update the software to match the system hardware.
For improved durability and high-quality operation, check for firmware updates from the manufacturer.
Emerging Trends in LED Technology Repair
1. Modular Displays
Today’s LED panels are segmented, meaning that if a portion of the screen is damaged, that portion can be replaced rather than the entire screen.
Prerequisites for modular connections include training during repair.
2. AI-powered Diagnostics
AI is gradually entering the diagnostics field, performing real-time checks and resolving minor glitches that could potentially disable a device.
3. Energy-Efficient Repairs
Most of these changes indicate that repairing LED screens rather than replacing them increases the utilization of energy-efficient components, supporting green technology.
Conclusion
This guide explains everything you need to know about diagnosis and repair to help you fix even the most difficult LED screen issues. These troubleshooting steps can help extend the lifespan and stability of your LED display. If you need to purchase LED screen , click the link to visit our screen list .